How To Use Chocolate Candy Molds

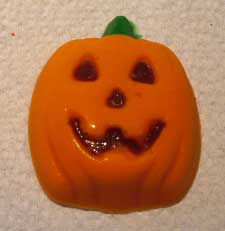
Chocolate candy molds are an easy way to make homemade custom chocolate. Add them to your candy making supplies. And wow everyone with your talent!
Make novelty candy treats for a wedding. Match the color scheme! Or mold rubber duckies, tiny teddies, or baby bottle pops for baby showers.
Create candies, candy cups or lollipops for your valentine. Make pumpkins for Halloween or chocolate Easter eggs. Or craft sea creatures, chess pieces, hearts, flowers, engagement rings, almost anything you can imagine.
Candy molds and candy melts make it easy. Get creative. Give as gifts or use as party favors or cake decorations. Learn how now!
Pick A Mold
Making homemade candy can be quite fun and rewarding. Or it can be frustrating.
So here are a few questions that may help you avoid choosing the wrong mold! Or save you from wasting money on supplies.
Candy making isn't for everyone.
Before you rush out to buy candy or lollipop molds, answer these questions...
Are you a patient person?
Do you have steady hands?
Do you have good eye sight?
Do you like to deal with details?
So did you answer yes to each one? Then you can probably handle any mold. The details won't deter you. But remember, the more detailed the chocolate candy mold the more time it takes to make.
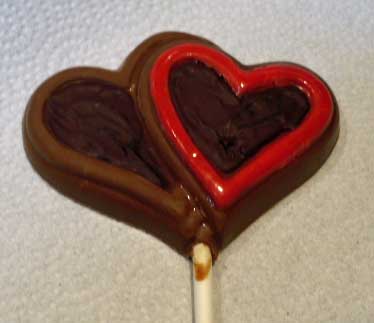
Ok, if you answered no to one or more questions, keep it simple.
Pick a plain pattern or just use one color. A detailed design would be
difficult, maybe impossible.
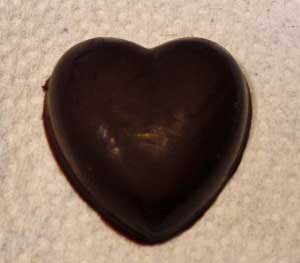
Who needs more aggravation? Assess your abilities then buy.
Candy Making Supplies
Here's what you'll need to make your masterpieces...
Chocolate candy moldsCandy wafers or melts- easy to melt chocolate that can be reheated repeatedly. Melt and pour.
Decorator bag(s) (recommended) preferably disposable saves clean up time, squeeze bottle(s), special funnel, or spoon for filling mold
Small stiff paintbrush(es) for details
Lollipop sticks
You can use large food storage bags to fill the molds.
Optional supplies...
Electric melter-keeps candy at proper consistency
Assorted oil based candy colors-"dye" your chocolate
Candy decorating pens or markers-especially handy for the minute details like eyes or a ladybug's spots.
Flavorings-Wilton makes creme de menthe, cherry, cinnamon and peppermint.
Containers-boxes, bags, foil wrappers or cups
So many choices! You can make unique candy and dress it up for any occasion. Turn your homemade hand made into an elegant or fun gift.
Budget tight? Make your own wedding favors!
How to Use Chocolate Candy Molds
Ok, so you've gathered your supplies. But before you start melting and molding...
Make sure you've planned out your color scheme. Remember, you'll be working backwards. The top of the design is on the bottom of the mold.
Plan in hand? Great.
Is your mold clean and dry?
Let the fun begin...
Here's how I created my Jack-o-latern. These are the basics steps you'll use to create your own candies with chocolate candy molds.
First, I placed a handful of green candy discs in my sturdy plastic food storage bag (gallon size). Or you can use a candy decorating bag (recommended for better control).
Second, microwaved them for about thirty seconds. Then massaged the bag to make sure they were completely melted.
Third, sniped the very tip of the corner off the bag. Or the tip off the disposable decorating bag. Make the whole too large and you'll have a mess.
Fourth, carefully worked(squeezed) the melted candy down into the corner or tip of the bag. Secured the top of the bag with my right hand. A rubber band is also good. If you use a twist tie, remove before reheating!
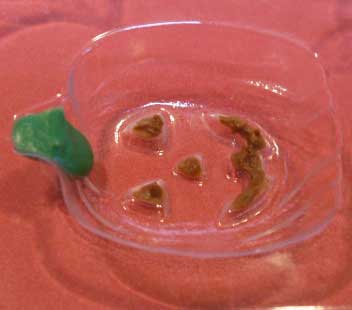
Fifth, filled the stem with green candy. Tilted the mold so the candy wouldn't run down into Jack's face. Let dry or refrigerate till firm.
Sixth, carefully "painted" mouth, nose and eyes with chocolate. Let set.
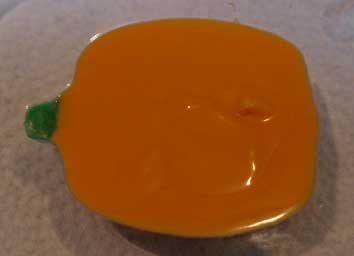
Seventh, melted orange candy wafers in another bag. Piped in the orange to complete the pumpkin. Tapped out bubbles, gently. Let set.
Eighth, turned mold upside down. Tapped gently till candy came out. If it doesn't come out easily, refrigerate it and try again. Get'em cold before you unmold!
Ninth, admired my work of art for a moment, then repeated the process.
Tips For Using Chocolate Candy Molds Successfully
Here are a few things you need to know to prevent a candy catastrophe!
Be sure mold is dry before filling or refilling-watch for condensation from refrigeration
Don't fill too fast. When nearly full, tap to distribute melted candy, add more if needed.
When "painting" details be generous with candy "paint" or it may melt when you add next layer.
Make sure each detail (layer) is dry or set before you add the next.
Critical-after filling, be sure to tap candy mold on work surface long enough to remove all bubbles. Bubbles will ruin the look but not the taste.
Chocolate in the bag becomes firm. Reheat in microwave 15 to 20 seconds at a time till melted.
Cushion the surface the candy will land on when unmolded. Otherwise, pieces like the pumpkin's stem can (did) break off. That'll ruin your day!
Chocolate candy molds can make you look like an artist. Showcase your talent. Make eye-catching novelty treats. Create custom chocolate for gifts, baby showers, weddings or any occasion. There's probably a mold to meet your needs.
Find them at your local craft store. Or shop Amazon for Chocolate candy moldsReturn to Chocolate Candy Recipes
Return to Health Benefits of Dark Chocolate Home Page
New! Comments
Feeling the need to send some feedback? Leave me a comment in the box below.